How to Migrate Your Website from WordPress to Webflow
Why Migrate from WordPress to Webflow?
Before diving into the migration process, let’s explore some reasons why you might want to switch from WordPress to Webflow:
- Visual Design Control: Webflow offers a powerful, intuitive visual editor that provides greater design flexibility without needing extensive coding knowledge.
- Hosting and Speed: Webflow’s hosting is fast, secure, and optimized, eliminating the need for third-party hosting services.
- No Plugins Needed: Unlike WordPress, Webflow doesn’t rely on plugins, reducing potential compatibility or security issues.
- SEO-Friendly: Webflow comes with built-in SEO tools to help optimize your website’s visibility.
- Custom Interactions: Webflow allows for advanced animations and interactions that can elevate your site’s user experience.
Step 1: Plan Your Migration
Planning is crucial to ensure a smooth migration. Begin by auditing your current WordPress site:
Content Inventory
Identify all pages, posts, images, and other media that need to be migrated.
URL Mapping
Create a list of URLs from your WordPress site and plan their structure on Webflow. This will help maintain SEO and avoid broken links.
Backups
Before making any changes, back up your WordPress site. You can use plugins like UpdraftPlus or manually export your site files and database.
Step 2: Set Up Your Webflow Project
Create a new project in Webflow to begin designing your site. Here’s how to get started:
Choose a Template or Start from Scratch
Webflow offers several templates you can customize, or you can design your site from the ground up.
Set Up Your Site Structure
Define the pages, collections (for dynamic content), and navigation menus based on your WordPress site’s structure.
Customize the Design
Use Webflow’s visual editor to replicate your existing design or create a new one.
Step 3: Export Content from WordPress
To transfer your content, you’ll need to export it from WordPress. Here’s how:
Export Posts and Pages
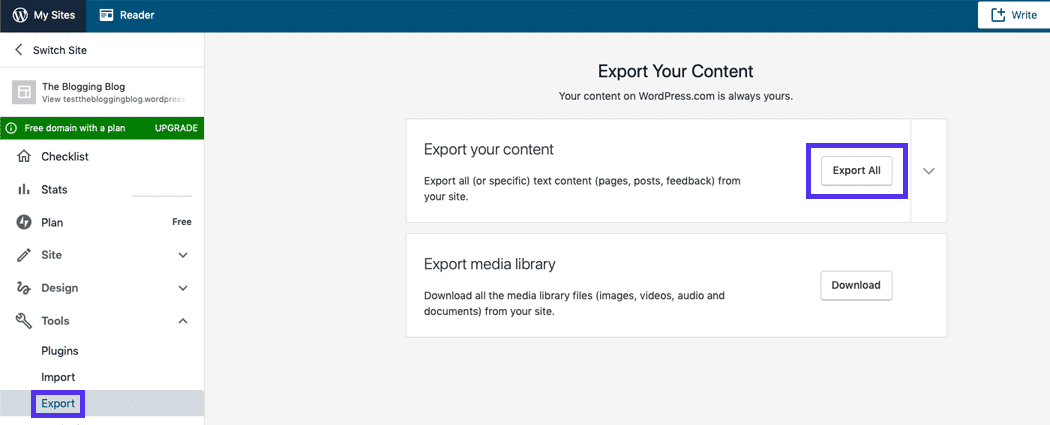
- Go to your WordPress dashboard.
- Navigate to
Tools > Export. - Select “All Content” to export posts, pages, and media.
- Download the XML file.
Export Media Files
- Use a plugin like "Export Media Library" to download all your images and files.
Step 4: Import Content into Webflow
Webflow supports importing content via CSV files. You’ll need to convert your WordPress XML file into a CSV file for this step. Tools like WP All Export can help.
Prepare the CSV File
- Map your WordPress content (e.g., titles, body text, images) to Webflow’s CMS fields.
- Ensure consistency in field names for a smooth import.
Import into Webflow
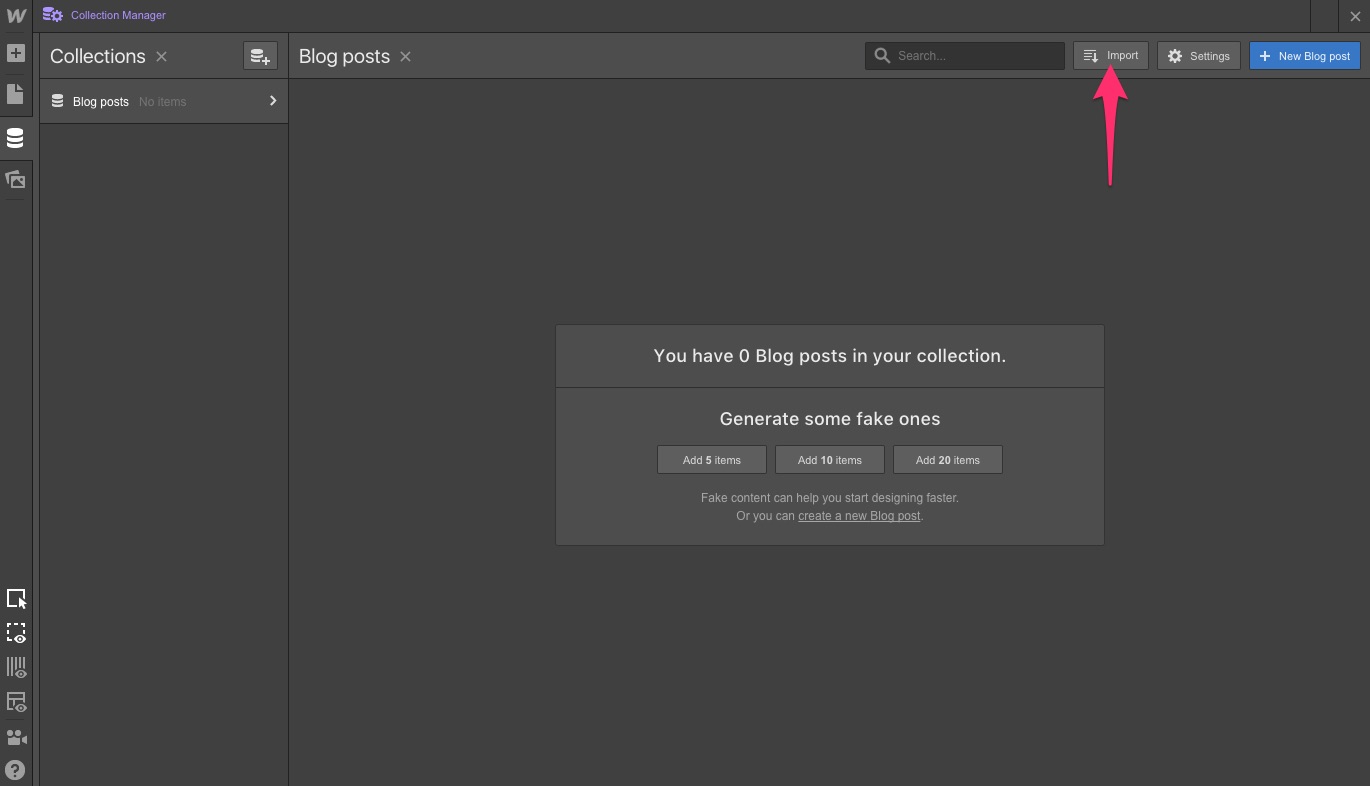
- In your Webflow dashboard, navigate to
CMS > Collections. - Click “Import” and upload your CSV file.
- Map the CSV fields to the corresponding Webflow CMS fields.
Upload Media Files
- Upload your images and other media directly into the Webflow Asset Manager.
Step 5: Recreate Pages and Design

Unlike WordPress, where themes dictate design, Webflow allows you to create custom designs for each page. Here’s what you’ll do:
Static Pages
- Recreate static pages like the homepage, about page, and contact page using Webflow’s designer.
- Add headings, paragraphs, images, and other elements.
Dynamic Content
- Use Webflow’s CMS Collections for blog posts, portfolio items, or any other dynamic content.
- Link your imported content to these collections to ensure everything displays correctly.
Navigation
- Recreate your navigation menu and ensure it’s consistent across all pages.
SEO Settings
- Set up meta titles, descriptions, and open graph settings for each page in Webflow’s SEO panel.
Step 6: Test Your Website
Before launching your Webflow site, thoroughly test it to ensure everything works as expected:
Check Links
Verify that all internal and external links are working.
Responsive Design
Test your site on different devices and screen sizes.
Content Accuracy
Ensure all content has been imported correctly and is formatted properly.
Forms
Test contact forms and other interactive elements.
SEO
Use tools like Google Search Console or Screaming Frog to identify any SEO issues.
Step 7: Set Up Redirects
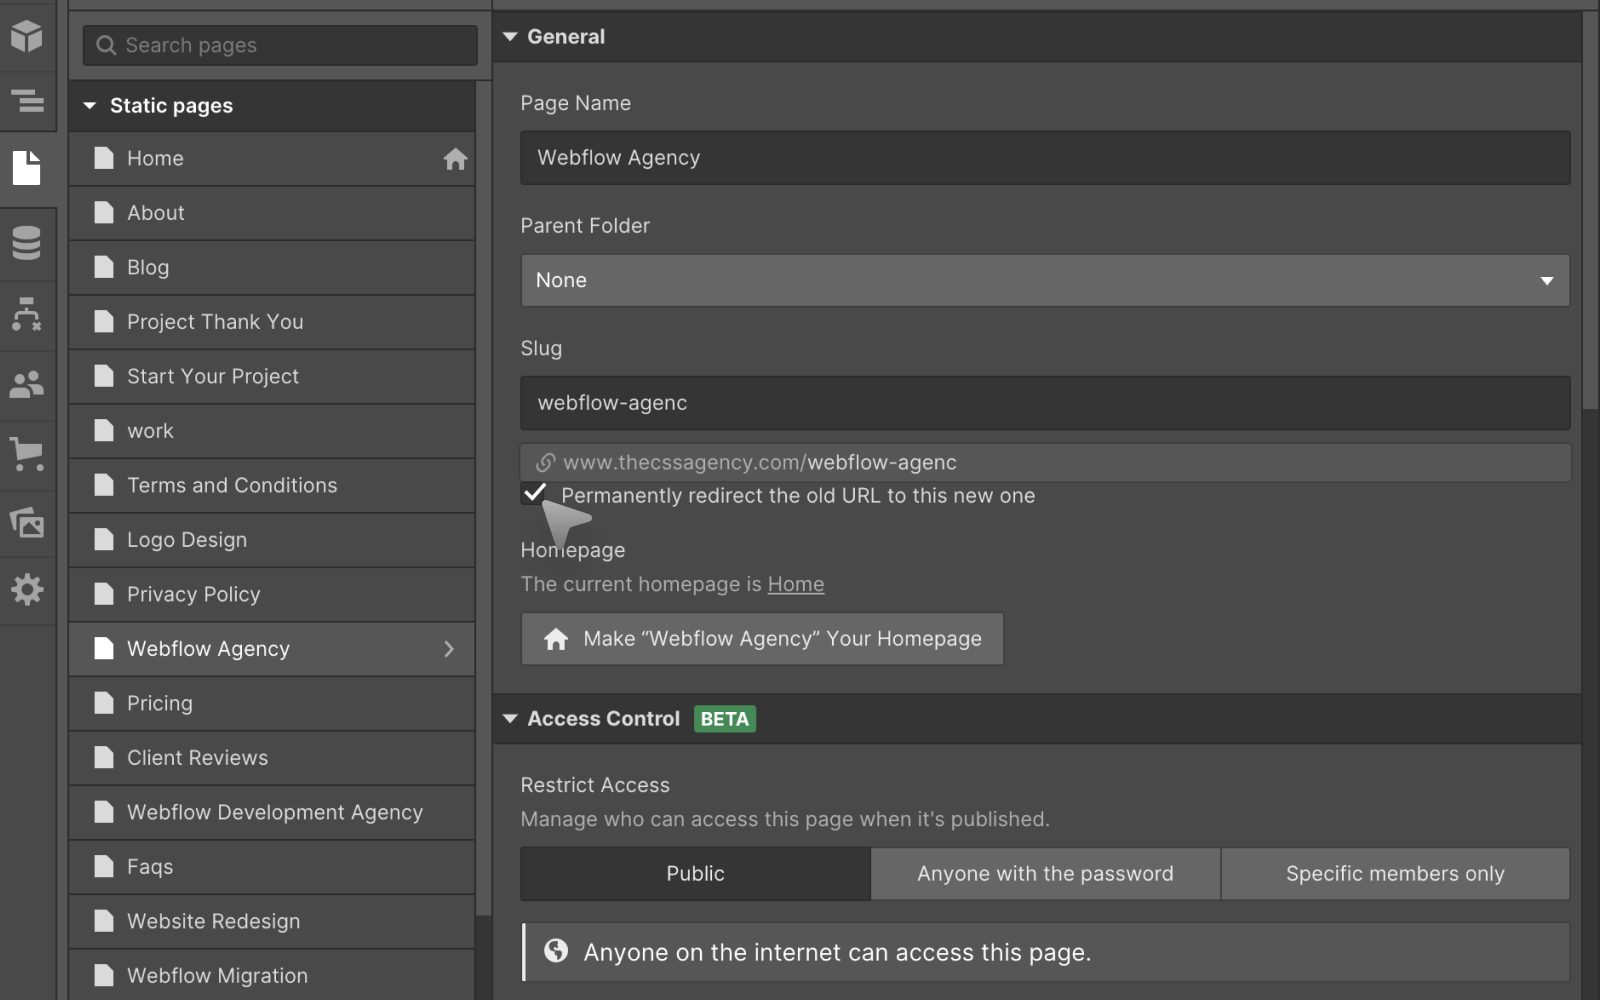
To preserve your SEO rankings, set up 301 redirects from your old WordPress URLs to the corresponding Webflow URLs:
Export URL List
- Export a list of your old WordPress URLs (you may have created this during Step 1).
Add Redirects in Webflow
- In your Webflow dashboard, navigate to
Settings > Hosting > 301 Redirects. - Add the old URL path and the new Webflow URL for each page.
Step 8: Launch Your Webflow Website
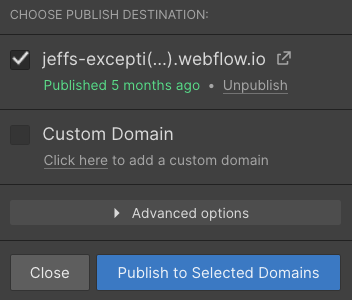
Once everything is ready, it’s time to make your Webflow site live:
Choose a Webflow Hosting Plan
Select a plan that suits your needs.
Connect Your Domain
- Update your domain’s DNS settings to point to Webflow’s servers.
- Follow Webflow’s domain setup guide for detailed instructions.
Publish Your Site
Click the “Publish” button in Webflow to make your site live.
Step 9: Monitor and Optimize
After launching your Webflow site, monitor its performance and make adjustments as needed:
Analytics
- Set up Google Analytics to track traffic and user behavior.
- Monitor performance using Webflow’s built-in analytics.
SEO
- Submit your sitemap to Google Search Console.
- Regularly update your content and optimize for keywords.
Feedback
- Gather feedback from users to identify any issues or areas for improvement.
Tips for a Smooth Migration
- Start Small: If your site is large, consider migrating a few pages first to familiarize yourself with the process.
- Use Webflow Support: Webflow offers extensive documentation and customer support to assist you.
- Hire Experts: If you’re not confident, consider hiring a Webflow expert to handle the migration for you.
Conclusion
Migrating your website from WordPress to Webflow can be a game-changer, offering enhanced design flexibility, improved performance, and better SEO capabilities. While the process requires careful planning and execution, the benefits of transitioning to Webflow far outweigh the challenges. By following this step-by-step guide, you can ensure a successful migration and unlock the full potential of your new Webflow website.


Turn Your Vision into a Scalable Digital Experience
From brand to backend, we create systems and experiences that actually move the needle.


